{var%20f='http://v.t.sina.com.cn/share/share.php?appkey=1515056452',u=z||d.location,p=['&url=',e(u),'&title=',e(t||d.title),'&source=',e(r),'&sourceUrl=',e(l),'&content=',c||'gb2312','&pic=',e(p||'')].join('');function%20a(){if(!window.open([f,p].join(''),'mb',['toolbar=0,status=0,resizable=1,width=440,height=430,left=',(s.width-440)/2,',top=',(s.height-430)/2].join('')))u.href=[f,p].join('');};if(/Firefox/.test(navigator.userAgent))setTimeout(a,0);else%20a();})(screen,document,encodeURIComponent,'','','https://www.xiaopingtou.cn//data/attach/topic/topicKPo7gB.jpg', '推荐 跳越间断点 的文章《NS3网络仿真(6): 总线型网络》','https://www.xiaopingtou.net/article-56218.html','页面编码gb2312|utf-8默认gb2312'));)
快乐虾http://blog.csdn.net/lights_joy/欢迎转载,但请保留作者信息
在NS3提供的第一个示例first.py中,模拟了一个点对点的网络,接下来的一个示例代码模拟了一个总线型网络及CSMA协议。
只不过NS3提供的示例代码是C++的,我们用Python改写它。
和first.py一样,我们先构造n0-n1之间的点对点连接: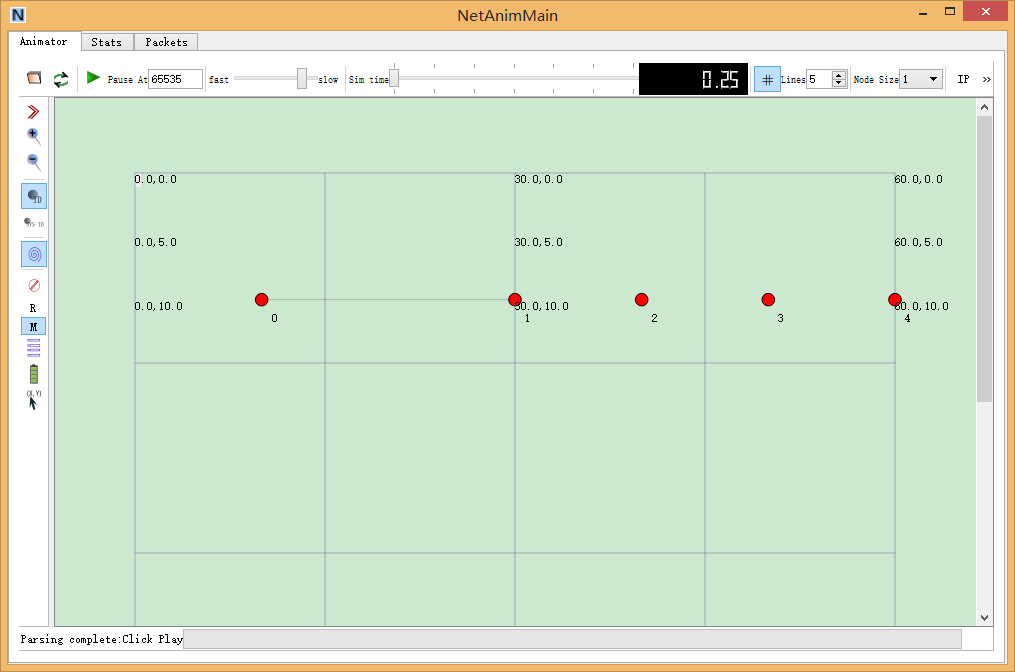
再让NS3保存模拟的数据包:
用etherreal打开生成的pcap文件,有点问题:
生成的数据包校验错误,校验码全为0。这是由于NS3没有打开Checksum的缘故,在脚本中加上一行:
ns.core.GlobalValue.Bind("ChecksumEnabled",ns.core.BooleanValue (True))
再运行此脚本:
在NS3提供的第一个示例first.py中,模拟了一个点对点的网络,接下来的一个示例代码模拟了一个总线型网络及CSMA协议。
# // Default Network Topology
# //
# //       10.1.1.0
# // n0 -------------- n1   n2   n3   n4
# //    point-to-point  |    |    |    |
# //                    ================
# //                      LAN 10.1.2.0
只不过NS3提供的示例代码是C++的,我们用Python改写它。
和first.py一样,我们先构造n0-n1之间的点对点连接:
# 构建点对点连接
p2pNodes = ns.network.NodeContainer()
p2pNodes.Create (2)

pointToPoint = ns.point_to_point.PointToPointHelper()
pointToPoint.SetDeviceAttribute ("DataRate", ns.core.StringValue ("5Mbps"))
pointToPoint.SetChannelAttribute ("Delay", ns.core.StringValue ("2ms"))
p2pDevices = pointToPoint.Install (p2pNodes)
再构造n1-n4之间的总线型连接:# 构建总线连接
nCsma = 3
csmaNodes = ns.network.NodeContainer()
csmaNodes.Add (p2pNodes.Get (1))
csmaNodes.Create (nCsma)
csma = ns.csma.CsmaHelper()
csma.SetChannelAttribute ("DataRate", ns.core.StringValue ("100Mbps"))
csma.SetChannelAttribute ("Delay", ns.core.TimeValue (ns.core.NanoSeconds (6560)))
csmaDevices = csma.Install (csmaNodes)
接下来为每个节点安装协议栈,这里需要注意的是每个节点只能安装一次,这也是这里使用p2pNodes.Get(0)的原因:# 安装协议栈
stack = ns.internet.InternetStackHelper()
stack.Install (p2pNodes.Get(0))
stack.Install (csmaNodes)
接下来为每个节点配置IP:# 配置IP
address = ns.internet.Ipv4AddressHelper()
address.SetBase (
ns.network.Ipv4Address("10.1.1.0"),
ns.network.Ipv4Mask("255.255.255.0"))
p2pInterfaces = address.Assign (p2pDevices)
address.SetBase (
ns.network.Ipv4Address("10.1.2.0"),
ns.network.Ipv4Mask("255.255.255.0"))
csmaInterfaces = address.Assign (csmaDevices)
接着配置要模拟运行的Echo服务和客户端:# 配置应用程序
echoServer = ns.applications.UdpEchoServerHelper (9)
serverApps = echoServer.Install (csmaNodes.Get (nCsma))
serverApps.Start (ns.core.Seconds (1.0))
serverApps.Stop (ns.core.Seconds (20.0))
echoClient = ns.applications.UdpEchoClientHelper (csmaInterfaces.GetAddress (nCsma), 9)
echoClient.SetAttribute ("MaxPackets", ns.core.UintegerValue (5))
echoClient.SetAttribute ("Interval", ns.core.TimeValue (ns.core.Seconds (1.0)))
echoClient.SetAttribute ("PacketSize", ns.core.UintegerValue (1024))
clientApps = echoClient.Install (p2pNodes.Get (0))
clientApps.Start (ns.core.Seconds (2.0))
clientApps.Stop (ns.core.Seconds (20.0))
由于我们使用了两个网段,因而需要配置路由:# 全局路由管理器根据节点产生 的链路通告为每个节点建立路由表
ns.internet.Ipv4GlobalRoutingHelper.PopulateRoutingTables()
此后我们就可以开始仿真了:# 开始仿真
ns.core.Simulator.Run()
ns.core.Simulator.Destroy()
此时我们的脚本还没有任何输出,我们让NS3生成可以在NetAnim中使用的xml文件,在run前添加下面的脚本:anim = ns.netanim.AnimationInterface('second.xml')
anim.SetConstantPosition(p2pNodes.Get(0), 10, 10)
anim.SetConstantPosition(csmaNodes.Get(0), 30, 10)
anim.SetConstantPosition(csmaNodes.Get(1), 40, 10)
anim.SetConstantPosition(csmaNodes.Get(2), 50, 10)
anim.SetConstantPosition(csmaNodes.Get(3), 60, 10)
运行此脚本后可以在项目路径下生成second.xml文件,在NetAnim下打开: 再让NS3保存模拟的数据包:
pointToPoint.EnablePcapAll ("second");
csma.EnablePcap ("second", csmaDevices.Get (1), True)
用etherreal打开生成的pcap文件,有点问题:
生成的数据包校验错误,校验码全为0。这是由于NS3没有打开Checksum的缘故,在脚本中加上一行:
ns.core.GlobalValue.Bind("ChecksumEnabled",ns.core.BooleanValue (True))
再运行此脚本: