{var%20f='http://v.t.sina.com.cn/share/share.php?appkey=1515056452',u=z||d.location,p=['&url=',e(u),'&title=',e(t||d.title),'&source=',e(r),'&sourceUrl=',e(l),'&content=',c||'gb2312','&pic=',e(p||'')].join('');function%20a(){if(!window.open([f,p].join(''),'mb',['toolbar=0,status=0,resizable=1,width=440,height=430,left=',(s.width-440)/2,',top=',(s.height-430)/2].join('')))u.href=[f,p].join('');};if(/Firefox/.test(navigator.userAgent))setTimeout(a,0);else%20a();})(screen,document,encodeURIComponent,'','','https://www.xiaopingtou.cn//data/attach/topic/topicKPo7gB.jpg', '推荐 245999503 的文章《海思Hi3518E烧写镜像》','https://www.xiaopingtou.net/article-57406.html','页面编码gb2312|utf-8默认gb2312'));)
切换芯片
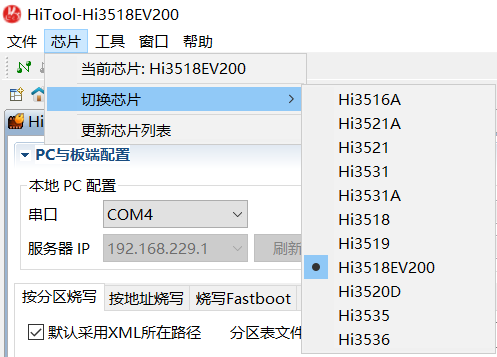 每个芯片的权限不同,如下面的有些功能不能用

 点击烧写,若提示找不到串口就先关闭软件,先叉串口,再打开软件
串口已经连接,请给单板上电,若已经上电,请断电后重新上电。
点击烧写,若提示找不到串口就先关闭软件,先叉串口,再打开软件
串口已经连接,请给单板上电,若已经上电,请断电后重新上电。
 正在下载:
正在下载:
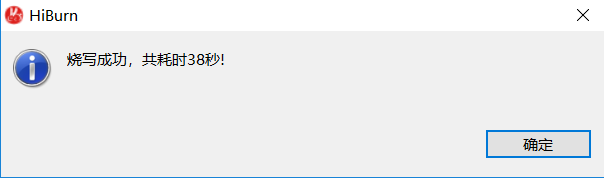
 最后烧写成功:
 从/home/aston/sambashare/Hi3518E_SDK_V1.0.3.0/osdrv/pub/image_uclibc复制下面三个文件到/tftpboot/中
 虚拟机上把网络该为192.168.1.141,最后重启虚拟机
然后在uboot中ping 192.168.1.141,如果不能ping通就再重启一下
虚拟机上把网络该为192.168.1.141,最后重启虚拟机
然后在uboot中ping 192.168.1.141,如果不能ping通就再重启一下
 设置serverip

每个芯片的权限不同,如下面的有些功能不能用
1 烧写UBOOT
选择好以下参数:
点击烧写,若提示找不到串口就先关闭软件,先叉串口,再打开软件
串口已经连接,请给单板上电,若已经上电,请断电后重新上电。
正在下载:
最后烧写成功:
从/home/aston/sambashare/Hi3518E_SDK_V1.0.3.0/osdrv/pub/image_uclibc复制下面三个文件到/tftpboot/中
虚拟机上把网络该为192.168.1.141,最后重启虚拟机
然后在uboot中ping 192.168.1.141,如果不能ping通就再重启一下
设置serverip
set serverip 192.168.1.141
构建分区:
分区名		分区大小	                起始地址		        截至地址
bootloader      1M			0x00000000		0x00100000
kernel          3M			0x00100000		0x00400000
rootfs          12M			0x00400000		0x01000000
2 烧写kernel
tftp更新并重新烧写kernel的命令序列:
mw.b 0x82000000 ff 0x300000
tftp 0x82000000 uImage_hi3518ev200
sf probe 0  //选择第几块spiflash
sf erase 0x100000 0x300000
sf write 0x82000000 0x100000 0x300000
//spiflash 写 sdram的地址 spiflash的地址 烧写的大小
3 烧写rootfs
tftp更新并重新烧写rootfs的命令序列:
mw.b 0x82000000 ff 0xc00000
tftp 0x82000000 rootfs_hi3518ev200_64k.jffs2
sf probe 0
sf erase 0x400000 0xc00000
sf write 0x82000000 0x400000 0xc00000
设置bootcmd和bootargs
set bootcmd 'sf probe 0;sf read 0x82000000 0x100000 0x300000;bootm 0x82000000'mem=32M:海思SOC中有64M内存,给MPP分配32M,给内核分配了32M root=/dev/mtdblock2:根文件系统是在第二个分区 mtdparts=hi_sfc:表示分区表,内核也有分区表,但是我们如果要修改,很不方便,可以通过设置这个参数来指定分区表 最后输入reset,启动成功
set bootargs mem=32M console=ttyAMA0,115200 root=/dev/mtdblock2 rootfstype=jffs2 mtdparts=hi_sfc:1024K(boot),3072K(kernel),12288K(rootfs)