专家
公告
财富商城
电子网
旗下网站
首页
问题库
专栏
标签库
话题
专家
NEW
门户
发布
提问题
发文章
springmvc文件上传
2019-04-15 14:55
发布
生成海报
站内文章
/
PIC单片机
10425
0
1690
1 配置虚拟路径
在tomcat上配置图片虚拟目录,在tomcat下conf/server.xml中添加:
访问http://localhost:8080/pic/x.jpg即可访问d:uploadx.jpg的图片
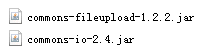
2 准备jar包
3 编写jsp前端页面
</span><span style="font-family:'宋体';">文件上传</span><span style="color:#e8bf6a;">
文件上传
action=
"
${
pageContext.request.contextPath
}
/upload.action"
method=
"post"
enctype=
"multipart/form-data"
>
type=
"file"
name=
"file"
>
type=
"submit"
value=
"
上传
"
>
 3 编写jsp前端页面
</span><span style="font-family:'宋体';">文件上传</span><span style="color:#e8bf6a;">
文件上传
3 编写jsp前端页面
</span><span style="font-family:'宋体';">文件上传</span><span style="color:#e8bf6a;">
文件上传
{var%20f='http://v.t.sina.com.cn/share/share.php?appkey=1515056452',u=z||d.location,p=['&url=',e(u),'&title=',e(t||d.title),'&source=',e(r),'&sourceUrl=',e(l),'&content=',c||'gb2312','&pic=',e(p||'')].join('');function%20a(){if(!window.open([f,p].join(''),'mb',['toolbar=0,status=0,resizable=1,width=440,height=430,left=',(s.width-440)/2,',top=',(s.height-430)/2].join('')))u.href=[f,p].join('');};if(/Firefox/.test(navigator.userAgent))setTimeout(a,0);else%20a();})(screen,document,encodeURIComponent,'','','https://www.xiaopingtou.cn//data/attach/topic/topicKPo7gB.jpg', '推荐 as875784622 的文章《springmvc文件上传》','https://www.xiaopingtou.net/article-61548.html','页面编码gb2312|utf-8默认gb2312'));)