工程系列-利用VSCode进行C++开发
VSCode:跨平台,轻量,插件多。能够在windows上编译的内容直接迁往linux,反之依然。所以浅了解了下
以下内容均为单源文本编译,debug,撰写等。
1, 插件安装
需要装基本的C++插件,CMake tools,C++ tools。这个可以上网搜,按照下载排行来进行下载。
cpptools,Code Runner,Include Autocomplete
2, 基本功能
2.1 最开始一步,.vscode/c_cpp_properties.json,ctrl+shift+p,然后输入如下图,记得一定要在C/CPP文件下输入这个命令
然后你就会得到,如果我们需要添加其他的一些依赖,就得重新更改,在includePath中添加文件。当然有了之前的配置,你的电脑装了GCC或者G++,也就是compilerPath是真实存在的,也可以运行,选中文件,右击,就会出现Run Code.蛮适合ACM 单文件编译的,和codeblocks差不多。

修改前:
{
    "configurations": [
        {
            "name": "Linux",
            "includePath": [
                "${workspaceFolder}/**"
            ],
            "defines": [],
            "compilerPath": "/usr/bin/gcc",
            "cStandard": "c11",
            "cppStandard": "c++17",
            "intelliSenseMode": "clang-x64"
        }
    ],
    "version": 4
}
修改后:
{
    "configurations": [
        {
            "name": "Linux",
            "includePath": [
                "${workspaceFolder}/**",
                "/home/zou/code/tensorflow",
                "/home/zou/code/tensorflow/bazel-genfiles",
                "/home/zou/code/tensorflow/bazel-bin/tensorflow",
                "/usr/local/include/eigen3",
                "/home/zou/code/tensorflow/tensorflow/contrib/makefile/downloads/absl",
                "/usr/local/include/google/protobuf",
                "/home/zou/code/tensorflow/tensorflow/contrib/makefile/downloads/nsync/public",
                "/usr/local/include/opencv4"
            ],
            "defines": [],
            "compilerPath": "/usr/bin/gcc",
            "cStandard": "c11",
            "cppStandard": "c++17",
            "intelliSenseMode": "clang-x64",
            "compileCommands": "${workspaceFolder}/build/compile_commands.json"
        }
    ],
    "version": 4
}
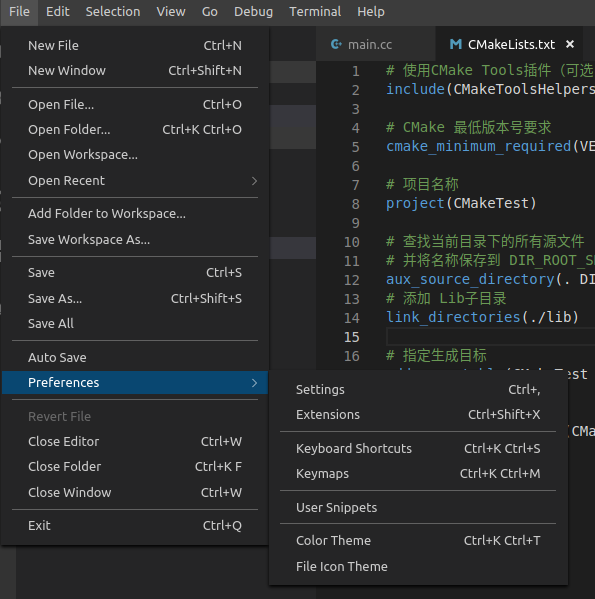
2.2 自动补全,我用的是比较新的版本,我也不知道是哪个,和之前不一样 File->Preferences->Settings


然后还得采用上面那个插件才能自动补全,且这个自动补全是从你c_cpp_properties中include头文件来读取的。
2.3 tasks.json,要调试首先先编译,命令为Ctrl+shift+B(也要在C/CPP文件下输入命令)就会自动让你选择,我选择的是others,其实也没关系,反正需要更改的。这个tasks.json应该是还可以配置别的的,但是目前我暂时不知道。
我的配置如下:
{
    "version": "0.1.0",
    "command": "g++",
    "isShellCommand": true,    // 是否为Shell命令
    "args": ["-g","${file}","-o","${fileDirname}/${fileBasenameNoExtension}.out"],
    "showOutput": "always",
    "problemMatchers": []
}
这样就能生成.out文件,这样才可以进行debug。如果是.c后缀记得将g++改为gcc。
2.4 调试,有了2/3生成的.out就能进行调试。首先按F5,如果第一次的,它会给你生成一个launcn.json。我的配置如下,再重新按F5就能调试了,记得打断点,然后F10单步调试,有变量区,很爽,比Visual studio要好,然后F11是进入函数内部调试。
{
    // Use IntelliSense to learn about possible attributes.
    // Hover to view descriptions of existing attributes.
    // For more information, visit: https://go.microsoft.com/fwlink/?linkid=830387
    "version": "0.2.0",
    "configurations": [
        {
            "name": "(gdb) Launch",
            "type": "cppdbg",
            "request": "launch",
            "program": "${fileDirname}/${fileBasenameNoExtension}.out",
            "args": [],
            "stopAtEntry": false,
            "cwd": "${workspaceFolder}",
            "environment": [],
            "externalConsole": false,
            "MIMode": "gdb",
            "setupCommands": [
                {
                    "description": "Enable pretty-printing for gdb",
                    "text": "-enable-pretty-printing",
                    "ignoreFailures": true
                }
            ]
        }
    ]
}
2.5 运行cmake,首先你得装插件,在插件中搜索 cmake应该就有了。vscode还能支持CMakeFile.list,首先你得先写Cmake文件,可以参考我上一篇。然后建立build与lib,然后在Cmake文件下,按ctrl+shift+p输入 Cmake configure 如果没有报错,然后输入Cmake build。这样就可以啦,我的运行效果。

然后在终端中运行就可以了。
总结:当然vs没有那么简单,我只是做了下简单的示范。总体上sublime很像,但是vs开源,所以公司可以用,资磁。
{var%20f='http://v.t.sina.com.cn/share/share.php?appkey=1515056452',u=z||d.location,p=['&url=',e(u),'&title=',e(t||d.title),'&source=',e(r),'&sourceUrl=',e(l),'&content=',c||'gb2312','&pic=',e(p||'')].join('');function%20a(){if(!window.open([f,p].join(''),'mb',['toolbar=0,status=0,resizable=1,width=440,height=430,left=',(s.width-440)/2,',top=',(s.height-430)/2].join('')))u.href=[f,p].join('');};if(/Firefox/.test(navigator.userAgent))setTimeout(a,0);else%20a();})(screen,document,encodeURIComponent,'','','https://www.xiaopingtou.cn//data/attach/topic/topicKPo7gB.jpg', '推荐 猴子请来的援军 的文章《工程系列-利用VSCode进行C++开发》','https://www.xiaopingtou.net/article-74315.html','页面编码gb2312|utf-8默认gb2312'));)