{var%20f='http://v.t.sina.com.cn/share/share.php?appkey=1515056452',u=z||d.location,p=['&url=',e(u),'&title=',e(t||d.title),'&source=',e(r),'&sourceUrl=',e(l),'&content=',c||'gb2312','&pic=',e(p||'')].join('');function%20a(){if(!window.open([f,p].join(''),'mb',['toolbar=0,status=0,resizable=1,width=440,height=430,left=',(s.width-440)/2,',top=',(s.height-430)/2].join('')))u.href=[f,p].join('');};if(/Firefox/.test(navigator.userAgent))setTimeout(a,0);else%20a();})(screen,document,encodeURIComponent,'','','https://www.xiaopingtou.cn//data/attach/topic/topicKPo7gB.jpg', '推荐 新升电子8027 的文章《如何同时使AD中PCB各元器件的字符符号居中的方法》','https://www.xiaopingtou.net/article-91049.html','页面编码gb2312|utf-8默认gb2312'));)
1.首先打开一个PCB工程
图12.在已经画好的PCB图中选择一个字符符号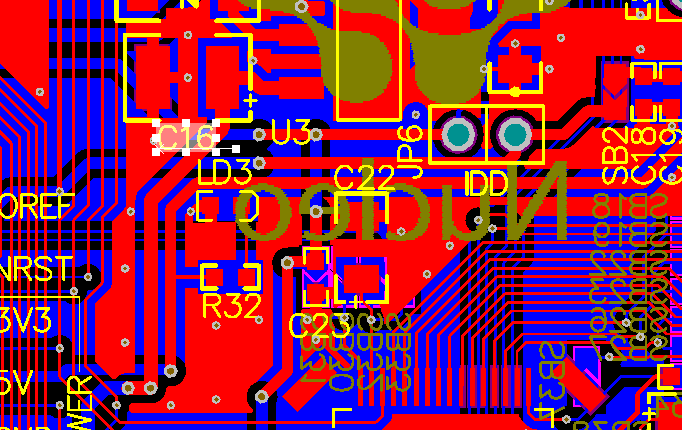
图2选择方法有以下几种:(1)直接鼠标选中,如图2中C16 (2)shift+f会出现十字,然后点击字符,如图中C16
3.选中后右击鼠标,出现查找相似对象选型,注:shift+f会直接出现查找相似对象的窗口
图34.点击查找相似对象,出现下面对话框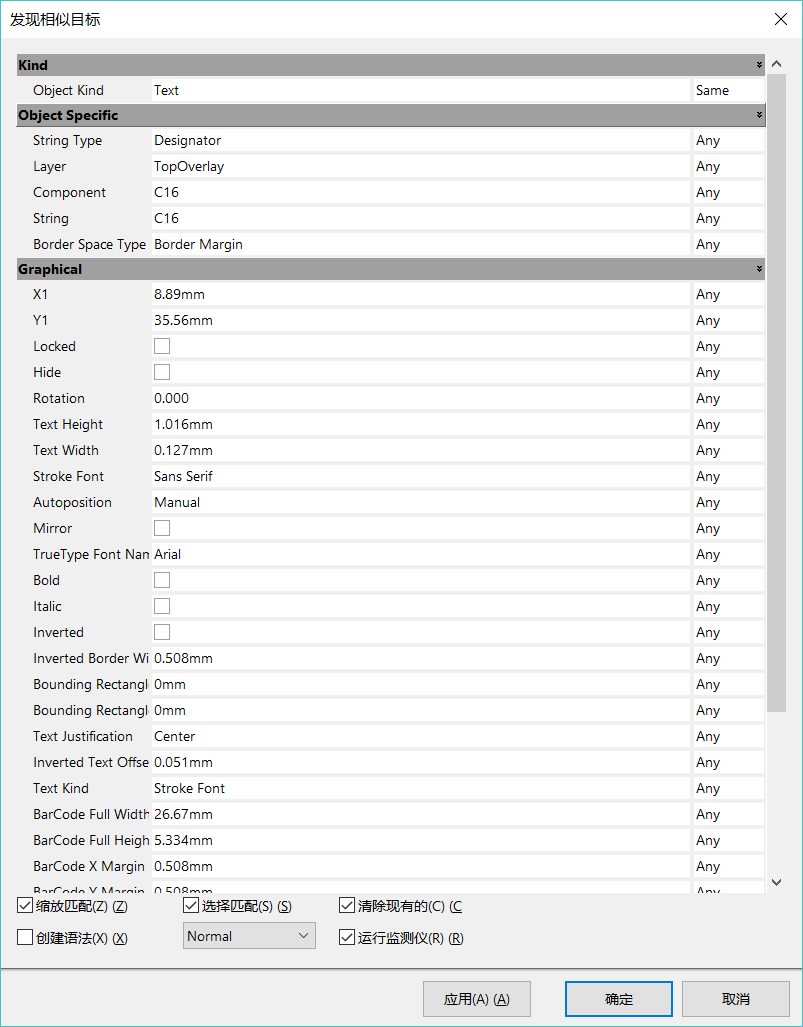
图45.更改Objecet Specific中的String Type中的Any为Same,点击确认。
图56.确认后出现PCB Inspector,如下图所示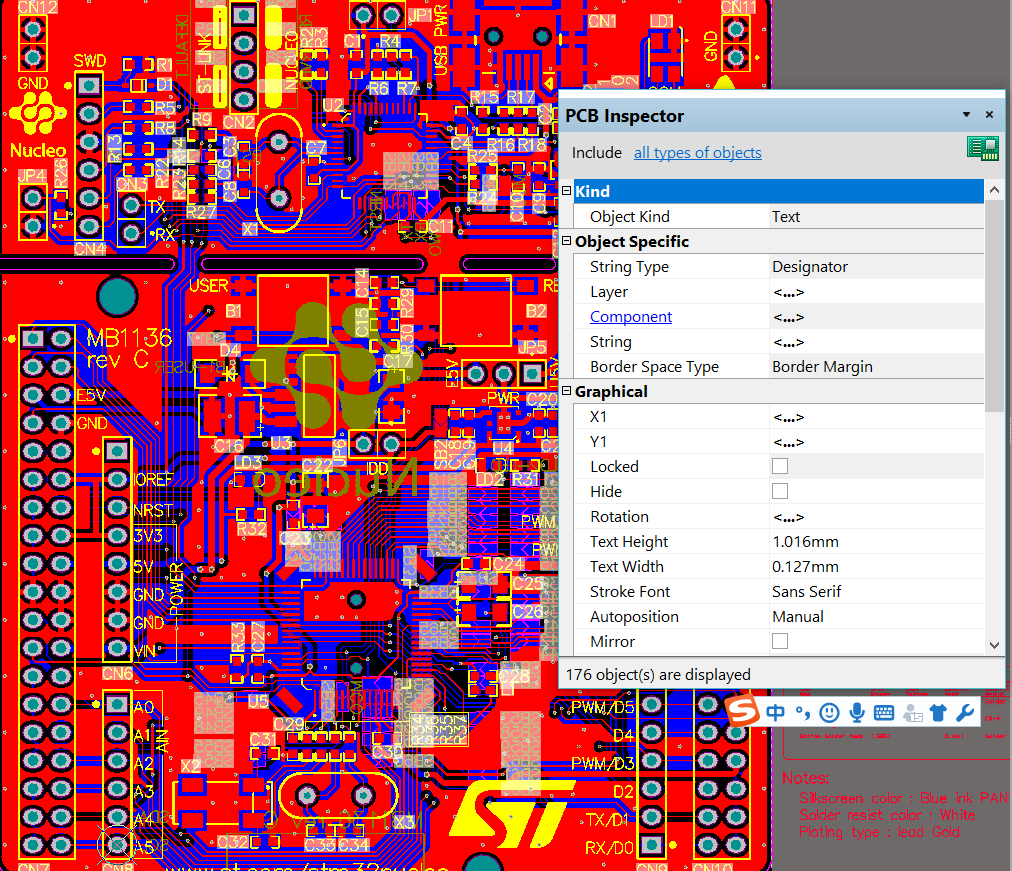
图67.更改Autoposition中的选项为Center后,所有字符居中,如下图所示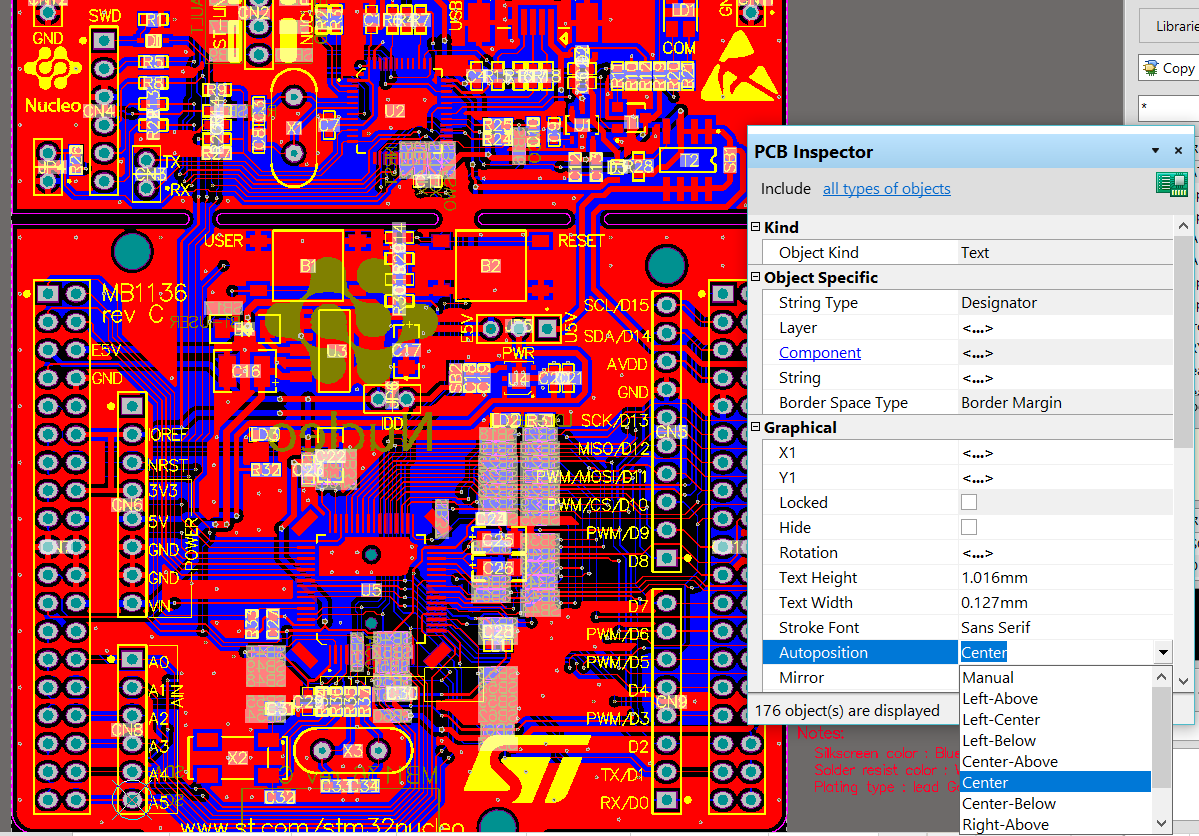
图7
图12.在已经画好的PCB图中选择一个字符符号
图2选择方法有以下几种:(1)直接鼠标选中,如图2中C16 (2)shift+f会出现十字,然后点击字符,如图中C16
3.选中后右击鼠标,出现查找相似对象选型,注:shift+f会直接出现查找相似对象的窗口
图34.点击查找相似对象,出现下面对话框
图45.更改Objecet Specific中的String Type中的Any为Same,点击确认。
图56.确认后出现PCB Inspector,如下图所示
图67.更改Autoposition中的选项为Center后,所有字符居中,如下图所示
图7