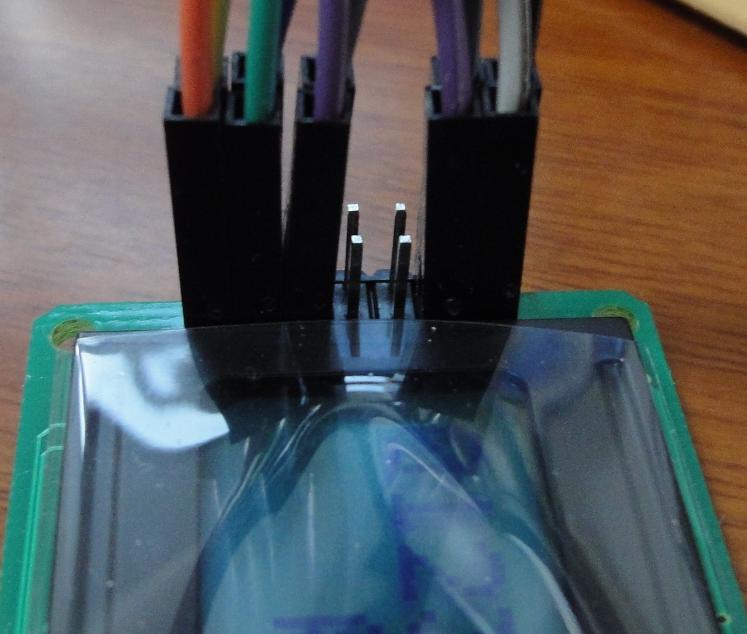
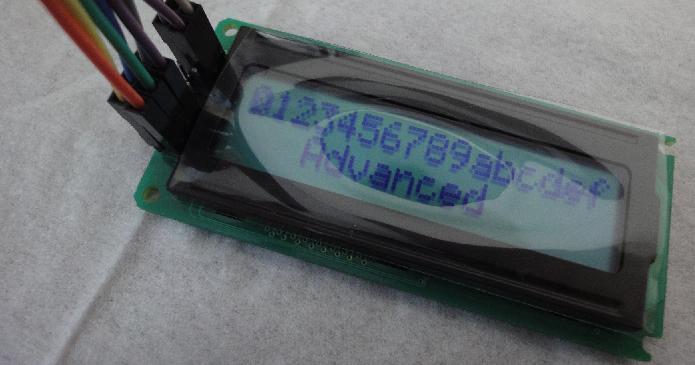
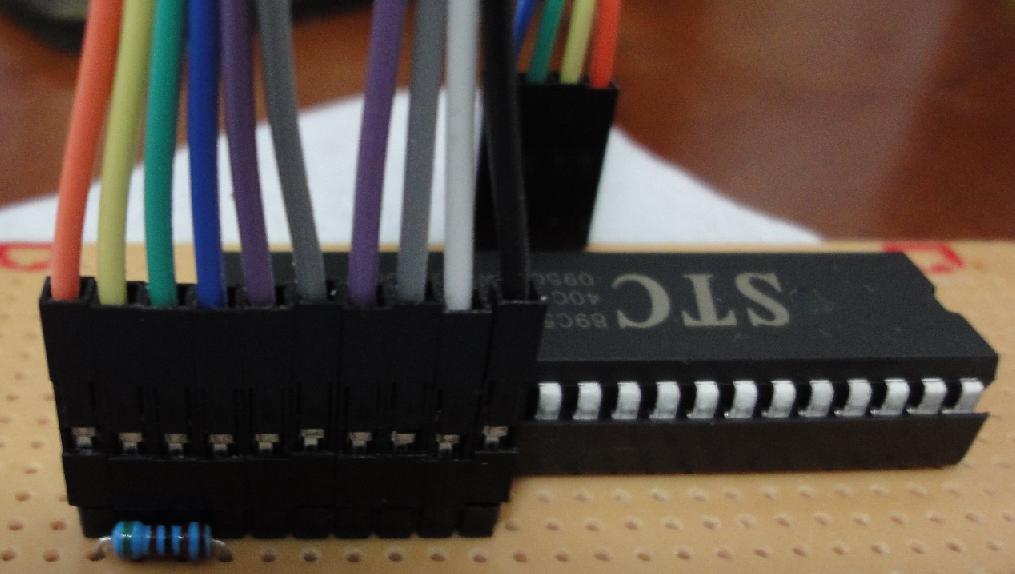
上图:

(原文件名:未命名.JPG)

(原文件名:未命名2.JPG)

(原文件名:未命名3.JPG)
程序:
#include<AT89X52.h>
//lcd part
#define LINE1 0
#define LINE2 1
#define LINE1_HEAD 0x80
#define LINE2_HEAD 0xC0
#define CLEARSCREEN LCD_en_com(0x01)
/*************************************/
//change this part at different board
sbit DB7=P2^6;
sbit DB6=P2^5;
sbit DB5=P2^4;
sbit DB4=P2^3;
sbit LCD1602_RS=P2^0; //data command select 1 data 0 command pin 4
sbit LCD1602_RW=P2^1; //read write select 1 read 0 write pin 5
sbit LCD1602_EN=P2^2; //LCD enable signal pin 6
/********************************************************************/
void delay(unsigned int n)
{
unsigned int i=0,j=0;
for (i=n;i>0;i--)
for (j=0;j<12;j++);
}
void LCD_en_com(unsigned char command)
{
DB7=(command>>7)%2;
DB6=(command>>6)%2;
DB5=(command>>5)%2;
DB4=(command>>4)%2;
LCD1602_RS = 0; //RS 0
LCD1602_RW = 0; //RW 0
LCD1602_EN = 1; //EN --|/__ Write command
delay(2);
LCD1602_EN = 0;
DB7=(command>>3)%2;
DB6=(command>>2)%2;
DB5=(command>>1)%2;
DB4=(command>>0)%2;
LCD1602_RS = 0; //RS 0
LCD1602_RW = 0; //RW 0
LCD1602_EN = 1; //EN --|/__ Write command
delay(2);
LCD1602_EN = 0;
}
void LCD_en_dat(unsigned char command)
{
DB7=(command>>7)%2;
DB6=(command>>6)%2;
DB5=(command>>5)%2;
DB4=(command>>4)%2;
LCD1602_RS = 1; //RS 1
LCD1602_RW = 0; //RW 0
LCD1602_EN = 1; //EN --|/__ Write data
delay(2);
LCD1602_EN = 0;
DB7=(command>>3)%2;
DB6=(command>>2)%2;
DB5=(command>>1)%2;
DB4=(command>>0)%2;
LCD1602_RS = 1; //RS 1
LCD1602_RW = 0; //RW 0
LCD1602_EN = 1; //EN --|/__ Write data
delay(2);
LCD1602_EN = 0;
}
void LCD_set_xy(unsigned char x,unsigned char y)
{
unsigned char address;
if(y == LINE1)
address = LINE1_HEAD + x;
else
address = LINE2_HEAD + x;
delay(10);
LCD_en_com(address);
}
void LCD_write_string(unsigned char x,unsigned char y,unsigned char *s)
{
LCD_set_xy(x,y);
while(*s)
{
LCD_en_dat(*s);
s++;
}
}
void LCD_init(void)
{
delay(50);
LCD_en_com(0x33);//原来1602初始化成4位数据线之前必需先初始化成8位(此时命令发送方式是8位格式,但数据线只需接4位)
delay(10);
LCD_en_com(0x32);//然后再改到4位线宽,这样初始化才稳定
delay(10);
LCD_en_com(0x28);//四线模式设置
delay(10);
LCD_en_com(0x0c);//显示开--对应开关显示控制指令
delay(10);
CLEARSCREEN;
delay(30);
}
/********************************************************************/
void main(void)
{
LCD_init();
LCD_write_string(0,LINE1,"0123456789abcdef");
LCD_write_string(3,LINE2,"Advanced");
while(1);
}

(原文件名:未命名.JPG)

(原文件名:未命名2.JPG)

(原文件名:未命名3.JPG)
程序:
#include<AT89X52.h>
//lcd part
#define LINE1 0
#define LINE2 1
#define LINE1_HEAD 0x80
#define LINE2_HEAD 0xC0
#define CLEARSCREEN LCD_en_com(0x01)
/*************************************/
//change this part at different board
sbit DB7=P2^6;
sbit DB6=P2^5;
sbit DB5=P2^4;
sbit DB4=P2^3;
sbit LCD1602_RS=P2^0; //data command select 1 data 0 command pin 4
sbit LCD1602_RW=P2^1; //read write select 1 read 0 write pin 5
sbit LCD1602_EN=P2^2; //LCD enable signal pin 6
/********************************************************************/
void delay(unsigned int n)
{
unsigned int i=0,j=0;
for (i=n;i>0;i--)
for (j=0;j<12;j++);
}
void LCD_en_com(unsigned char command)
{
DB7=(command>>7)%2;
DB6=(command>>6)%2;
DB5=(command>>5)%2;
DB4=(command>>4)%2;
LCD1602_RS = 0; //RS 0
LCD1602_RW = 0; //RW 0
LCD1602_EN = 1; //EN --|/__ Write command
delay(2);
LCD1602_EN = 0;
DB7=(command>>3)%2;
DB6=(command>>2)%2;
DB5=(command>>1)%2;
DB4=(command>>0)%2;
LCD1602_RS = 0; //RS 0
LCD1602_RW = 0; //RW 0
LCD1602_EN = 1; //EN --|/__ Write command
delay(2);
LCD1602_EN = 0;
}
void LCD_en_dat(unsigned char command)
{
DB7=(command>>7)%2;
DB6=(command>>6)%2;
DB5=(command>>5)%2;
DB4=(command>>4)%2;
LCD1602_RS = 1; //RS 1
LCD1602_RW = 0; //RW 0
LCD1602_EN = 1; //EN --|/__ Write data
delay(2);
LCD1602_EN = 0;
DB7=(command>>3)%2;
DB6=(command>>2)%2;
DB5=(command>>1)%2;
DB4=(command>>0)%2;
LCD1602_RS = 1; //RS 1
LCD1602_RW = 0; //RW 0
LCD1602_EN = 1; //EN --|/__ Write data
delay(2);
LCD1602_EN = 0;
}
void LCD_set_xy(unsigned char x,unsigned char y)
{
unsigned char address;
if(y == LINE1)
address = LINE1_HEAD + x;
else
address = LINE2_HEAD + x;
delay(10);
LCD_en_com(address);
}
void LCD_write_string(unsigned char x,unsigned char y,unsigned char *s)
{
LCD_set_xy(x,y);
while(*s)
{
LCD_en_dat(*s);
s++;
}
}
void LCD_init(void)
{
delay(50);
LCD_en_com(0x33);//原来1602初始化成4位数据线之前必需先初始化成8位(此时命令发送方式是8位格式,但数据线只需接4位)
delay(10);
LCD_en_com(0x32);//然后再改到4位线宽,这样初始化才稳定
delay(10);
LCD_en_com(0x28);//四线模式设置
delay(10);
LCD_en_com(0x0c);//显示开--对应开关显示控制指令
delay(10);
CLEARSCREEN;
delay(30);
}
/********************************************************************/
void main(void)
{
LCD_init();
LCD_write_string(0,LINE1,"0123456789abcdef");
LCD_write_string(3,LINE2,"Advanced");
while(1);
}
友情提示: 此问题已得到解决,问题已经关闭,关闭后问题禁止继续编辑,回答。
你可以把1602的RW线接地,然后分析一下其他地方控制有没有问题。
/*********************************包含头文件********************************/
#include <reg51.h>
#include <intrins.h>
/*********************************端口定义**********************************/
sbit rs = P2^0;
sbit rw = P2^1;
sbit ep = P2^2;
/********************************显示数据表*********************************/
unsigned char code dis1[] = {"www.hificat.com"};
unsigned char code dis2[] = {"0571-85956028"};
/*****************************************************************************
函数功能:LCD延时子程序
入口参数:ms
出口参数:
*****************************************************************************/
void delay(unsigned char ms)
{
unsigned char i;
while(ms--)
{
for(i = 0; i< 250; i++)
{
_nop_();
_nop_();
_nop_();
_nop_();
}
}
}
/*****************************************************************************
函数功能:测试LCD忙碌状态
入口参数:
出口参数:result
*****************************************************************************/
bit lcd_bz()
{
bit result;
rs = 0;
rw = 1;
ep = 1;
_nop_();
_nop_();
_nop_();
_nop_();
result = (bit)(P0 & 0x80);
ep = 0;
return result;
}
/*****************************************************************************
函数功能:写指令数据到LCD子程序
入口参数:cmd
出口参数:
*****************************************************************************/
void lcd_wcmd(unsigned char cmd)
{
while(lcd_bz()); //判断LCD是否忙碌
rs = 0;
rw = 0;
ep = 0;
_nop_();
_nop_();
P0 = cmd;
_nop_();
_nop_();
_nop_();
_nop_();
ep = 1;
_nop_();
_nop_();
_nop_();
_nop_();
ep = 0;
}
/*****************************************************************************
函数功能:设定显示位置子程序
入口参数:pos
出口参数:
*****************************************************************************/
void lcd_pos(unsigned char pos)
{
lcd_wcmd(pos | 0x80);
}
/*****************************************************************************
函数功能:写入显示数据到LCD子程序
入口参数:dat
出口参数:
*****************************************************************************/
void lcd_wdat(unsigned char dat)
{
while(lcd_bz()); //判断LCD是否忙碌
rs = 1;
rw = 0;
ep = 0;
P0 = dat;
_nop_();
_nop_();
_nop_();
_nop_();
ep = 1;
_nop_();
_nop_();
_nop_();
_nop_();
ep = 0;
}
/*****************************************************************************
函数功能:LCD初始化子程序
入口参数:
出口参数:
*****************************************************************************/
void lcd_init()
{
lcd_wcmd(0x38);
delay(1);
lcd_wcmd(0x0c);
delay(1);
lcd_wcmd(0x06);
delay(1);
lcd_wcmd(0x01);
delay(1);
}
/*****************************************************************************
函数功能:主程序
入口参数:
出口参数:
*****************************************************************************/
void main(void)
{
unsigned char i;
lcd_init(); // 初始化LCD
delay(10);
lcd_pos(0x01); //设置显示位置
i = 0;
while(dis1 != '�')
{
lcd_wdat(dis1); //显示字符
i++;
}
lcd_pos(0x42); // 设置显示位置
i = 0;
while(dis2 != '�')
{
lcd_wdat(dis2); // 显示字符
i++;
}
while(1);
}
楼上说的情况,相当于没接单片机时的表现,你拿一块1602,接上电源,调好对比度,就会显示一行黑块,在第一行。
你可以把1602的rw线接地,然后分析一下其他地方控制有没有问题。
-----------------------------------------------------------------------
多谢wandy2010的指导,刚试了,发现这屏特殊,直接上电源,什么都没显示,接个10K的电位器调也不管用。估计是坏了
复【10楼】wandy2010
db7=(command>>7)%2;
这句是程序的精华,把显示数据的指定位上的数据(或0或1)取出来,送到数据线上。
lcd1602的这种用法非常好,尤其是用洞洞板做东西,mcu与lcd的引脚连线可以怎么方便怎么连,连好线后改程序定义。
-----------------------------------------------------------------------
不好吧。。。这种写法不知道编译出来是什么效果
用&0x01比较好吧。
-----------------------------------------------------------------------
愿闻其详,详细点说一下吧!
一周热门 更多>