本帖最后由 ngyg12 于 2013-10-29 11:54 编辑
RT, 现在板上两种设计,一种为SPI FLASH 配置,一种为使用 Linux 配置FPGA。
SPI FLASH 的方法可以使用,DONE也能拉高,FPGA 工作正常。当切换为从并配置时,DONE不能被拉高。
从并配置环境:
1:linux 使用的CPU为 atmel 的9G20.
2:使用8位模式。D0-D7.
3:CSI_B 和 RDWR_B 接地;CCLK 接 CPU 的 CS0 (chip select 0)。DONE 330欧姆上拉。CCLK 没有做50欧姆阻抗匹配和100欧姆分压。所有BANK电压均接
3.3V.
4:M0 = Ground.M1 = 3.3V.(直接接,没有上拉或者下拉)。
5:配置文件为.bit文件,没有经过iMPACTd的处理(也不知道怎么处理)。
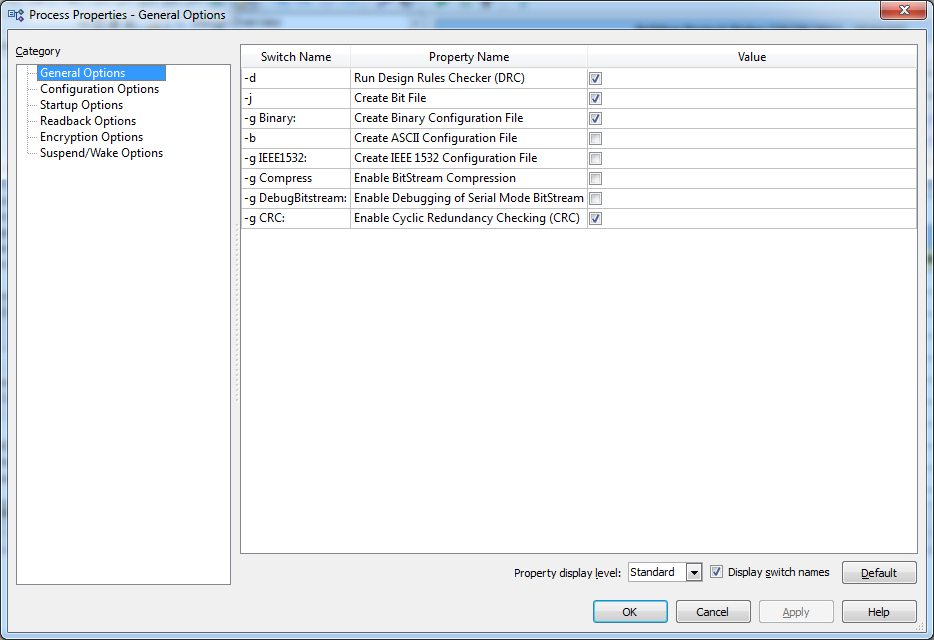
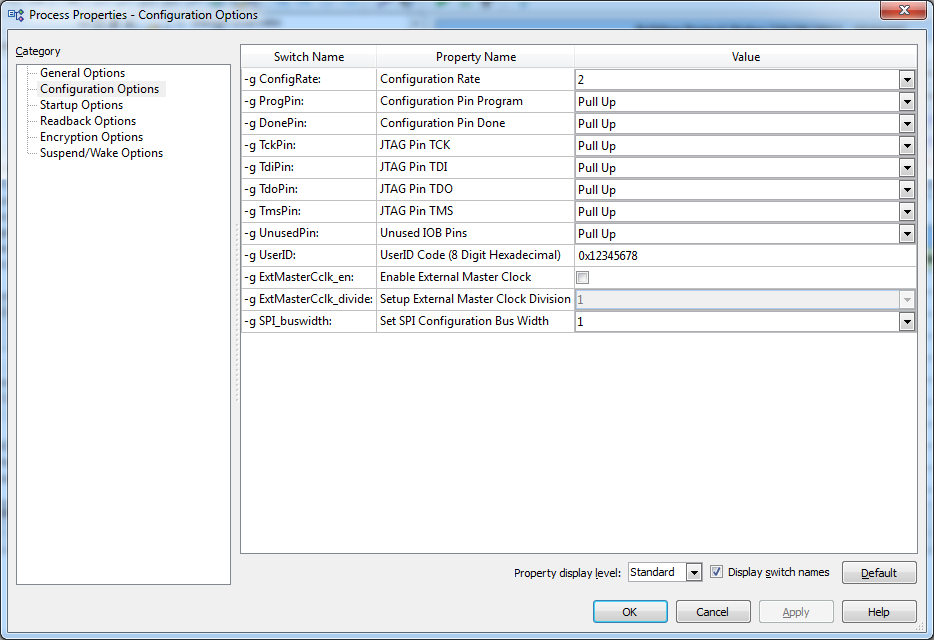
6:配置文件选项:
①:General Option:

②:Configuration Option:

③:StartUp Option:
7: linux 配置 代码:
// Set Pro to be 0 and wait for init to be 0
at91_set_gpio_output(PROGRAM_PIN, 0 );
printk ("Wait for init to be low... ");
mdelay (1);
do
{
rdtemp = at91_get_gpio_value ( INIT_PIN );
} while ( rdtemp );
//
// Set Pro to be 1 and wait for init to be 1
//
at91_set_gpio_output(PROGRAM_PIN, 1 );
udelay (10);
printk ("Wait for init to be high... ");
do
{
rdtemp = at91_get_gpio_value ( INIT_PIN );
} while ( !rdtemp );
//
// start to load the firmware
//
unsigned char code = 0;
for( i = 0; i < uiSize; i++ )
{
// Copy data
*ptr = *pSrc;
//ptr ++;
pSrc ++;
// waiting for FPGA not busy
while ( at91_get_gpio_value ( AT91_PIN_PB11 ) );
// check the init pin
if ( !at91_get_gpio_value( INIT_PIN ) )
{
printk ("crc error ... ");
printk ("i = %d ",i);
return -1;
}
}
//
// Waiting for DONE go to high
//
printk ("Wait for done to be high... ");
timeout = 0;
do
{
// read the DONE pin
rdtemp = at91_get_gpio_value (DONE_PIN);
timeout ++;
if ( timeout == 99999999 )
{
printk ("timeout... ");
return -1;
}
if ( !at91_get_gpio_value(INIT_PIN) )
{
printk ("crc error ... ");
return -1;
}
*ptr = 0x00;
} while ( !rdtemp );
// additional cycle
for ( i = 0; i < 8; i++)
{
*ptr = 0x00;
}
return 0;
}
代码流程:
1:设置PROGRAM_PIN 为低,等待1ms . 检测并等待INIT为低。
2:拉高PROGRAM_PIN,检测并等待INIT为高。
3 : 开始load FPGA 配置文件。(检测INIT与BUSY 信号)
4:检测DONE 是否为高,并一直发送0x00 提供时钟。
不知道这里面哪个环节出错,导致DONE 一直不能被拉高,FPGA 不能被正确配置,请做过的大虾们指教!!!
谢谢!!!
RT, 现在板上两种设计,一种为SPI FLASH 配置,一种为使用 Linux 配置FPGA。
SPI FLASH 的方法可以使用,DONE也能拉高,FPGA 工作正常。当切换为从并配置时,DONE不能被拉高。
从并配置环境:
1:linux 使用的CPU为 atmel 的9G20.
2:使用8位模式。D0-D7.
3:CSI_B 和 RDWR_B 接地;CCLK 接 CPU 的 CS0 (chip select 0)。DONE 330欧姆上拉。CCLK 没有做50欧姆阻抗匹配和100欧姆分压。所有BANK电压均接
3.3V.
4:M0 = Ground.M1 = 3.3V.(直接接,没有上拉或者下拉)。
5:配置文件为.bit文件,没有经过iMPACTd的处理(也不知道怎么处理)。
6:配置文件选项:
①:General Option:

②:Configuration Option:

③:StartUp Option:
7: linux 配置 代码:
// Set Pro to be 0 and wait for init to be 0
at91_set_gpio_output(PROGRAM_PIN, 0 );
printk ("Wait for init to be low... ");
mdelay (1);
do
{
rdtemp = at91_get_gpio_value ( INIT_PIN );
} while ( rdtemp );
//
// Set Pro to be 1 and wait for init to be 1
//
at91_set_gpio_output(PROGRAM_PIN, 1 );
udelay (10);
printk ("Wait for init to be high... ");
do
{
rdtemp = at91_get_gpio_value ( INIT_PIN );
} while ( !rdtemp );
//
// start to load the firmware
//
unsigned char code = 0;
for( i = 0; i < uiSize; i++ )
{
// Copy data
*ptr = *pSrc;
//ptr ++;
pSrc ++;
// waiting for FPGA not busy
while ( at91_get_gpio_value ( AT91_PIN_PB11 ) );
// check the init pin
if ( !at91_get_gpio_value( INIT_PIN ) )
{
printk ("crc error ... ");
printk ("i = %d ",i);
return -1;
}
}
//
// Waiting for DONE go to high
//
printk ("Wait for done to be high... ");
timeout = 0;
do
{
// read the DONE pin
rdtemp = at91_get_gpio_value (DONE_PIN);
timeout ++;
if ( timeout == 99999999 )
{
printk ("timeout... ");
return -1;
}
if ( !at91_get_gpio_value(INIT_PIN) )
{
printk ("crc error ... ");
return -1;
}
*ptr = 0x00;
} while ( !rdtemp );
// additional cycle
for ( i = 0; i < 8; i++)
{
*ptr = 0x00;
}
return 0;
}
代码流程:
1:设置PROGRAM_PIN 为低,等待1ms . 检测并等待INIT为低。
2:拉高PROGRAM_PIN,检测并等待INIT为高。
3 : 开始load FPGA 配置文件。(检测INIT与BUSY 信号)
4:检测DONE 是否为高,并一直发送0x00 提供时钟。
不知道这里面哪个环节出错,导致DONE 一直不能被拉高,FPGA 不能被正确配置,请做过的大虾们指教!!!
谢谢!!!
一周热门 更多>